Showing posts with label decor. Show all posts

Wednesday, March 14, 2012

Boy's Play Area Ideas

Is it really already Wednesday? It's hard to believe this week is already half over. I spent a few hours in the ER on Sunday. I still was feeling awful on Monday and exhausted from the late night, but I'm feeling much better after a few days of medicine.

Yesterday we had an ultrasound and doctor appointment to check on our little guy's weight. 36 weeks and he's already an estimated 7 pounds and 11 ounces! I was terrified that might be a little too big, but I get to continue to try for a VBAC. Yay! (My first was a cesarean and weighed 11 pounds, 5 ounces. I make big babies..) Hopefully he'll either come a little early or not grow too quickly in the next few weeks. I really don't want to go through another c-section and the long recovery that follows.

As many of you can imagine, I'm starting to feel the effects of late pregnancy and tire quickly, so I haven't done a lot of projects lately. I've got a few to share in the next few weeks, I just need to get everything put together. Right now we're trying to get a reading and play area set up for Xavier, and I think it's going to be awesome. My hubby is working on making a reclaimed wood bookshelf from old decking. I really can't wait to see the end result and share that with you too! I've been trying to find some inspiration for the decor at local thrift stores with little luck. Instead I turned to blogland and my favorite stores to inspire me with your brilliance. Here's some of my favorites. :)
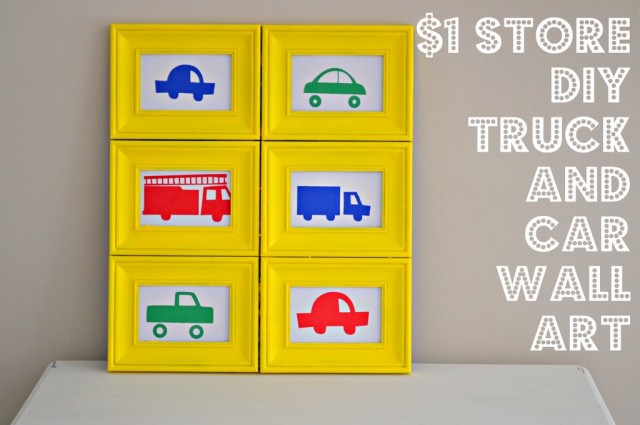
{Dollar Store DIY from Ashely @ Little Miss Momma}
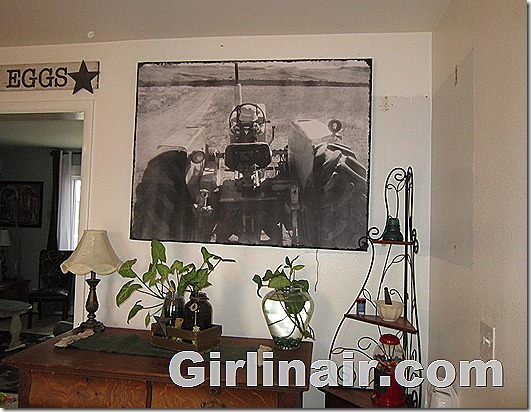
{DIY Giant "Canvas" Print from Michell @ Girl in Air}

{Framed Kite Art from Nat and Holly @ My Sister's Suitcase}

{Fabric Storage Boxes from Ashley @ Make it and Love it}

{Happy Day Garland from Dana @ MADE}

{Pinwheel tutorial from Victoria @ A Subtle Revelry}

{Mini Paper Lanterns @ Polka Dot Market}


{Choose the Right printable from Kristyn @ Lil' Luna}

{Mission Printable from Tami @ The Family: A Proclamation to the World}


I've got all my creative juices really flowing on this one! You are all so full of awesome ideas, and it's going to be hard for me to narrow it down and pinpoint exactly what I want to use for his fun corner. Hopefully we'll have a house soon and then I can really go nuts on an entire room. Until then, hopefully you can find some inspiration from my collection for your little guy (or gal!) too. :)

Have a wonderful day! Spring is just around the corner and it's time for me to get out and play a little. Enjoy the sun if you're lucky enough to have it too. :)


Photobucket

Wednesday, February 22, 2012

St. Patrick's Day Shamrock Art

Before we get into the shamrock art, I'm super stoked to announce that I made it into the Creative Blogger's Got Talent top 20 over at Every Creative Endeavor! Which means I've been brainstorming a new project for Round 2 all week, and I'm beyond excited. The voting begins next Tuesday, so I hope you'll hop on over there sometime this week and vote for your favorite project! :)

Now back to St. Paddy's Day, which just so happens to be one of my favorite holidays. I love getting to get dressed up in green just for it! My brother always tried to pass of his green eyes as enough to avoid getting pinched. I don't really think that counts, but I can't remember ever pinching him for it anyway. So in celebration of St. Patrick's Day, I put together this fun project for you all:


Materials Needed:
Green scrapbook paper of choice
Frame of choice
Shamrock clipart*
Craft string or twine
Hot glue gun
Any desired additional embellishments

*Google "shamrock clipart" under Images and pick out a shape you like to create a stencil. Print it one photo size smaller than your frame. I.e., my frame is 5"x7" and my clipart was printed as a 4"x6".

Step 1: Cut your scrapbook paper to fit in your frame. Carefully cut out your shamrock shape out of the center of your paper. (see below)

Step 2: Center the shamrock on your scrapbook paper and trace it so you have an outline to follow.
Step 3: Starting at one corner of the shamrock stem, begin gluing your string around the outline you just drew in small sections. (Glue the end tail on the inside of the shamrock to hide it; see below.)

Step 4: Continue to follow the outline of the shamrock, gluing the string in small sections. When you reach your starting point, glue over the top of your end tail, and begin a new row along the inside of the first row.
Row 1 complete

Row 2 complete

Step 5: Continue to glue new rows until you're satisfied with the end result. I filled in the entire shamrock, but just a few rows would look great too.

Tip: If your stem is narrower where it meets the leaves like mine, you will not be able to continue around and fill in the entire stem. At the end of the 3rd row I did a squiggle at the end of my stem to fill it in before coming back up to continue around the leaves.

Step 5: If you'd like to add any embellishments to the shamrock itself do so now. (Maybe a green bow or ribbon.) Place your finished shamrock in your frame and admire it! I thought my frame looked a little plain so I added a green flower and some green feathers. And now you're done! :)

I can't believe February is almost over. That means little man will be here soon! Yay! 
Have a wonderful week! :)


Linking to:


Photobucket

Wednesday, February 15, 2012

West Elm Origami Throw Pillow Knock-off

Hey everyone! You're getting two posts today cause I think you're extra super special. :)
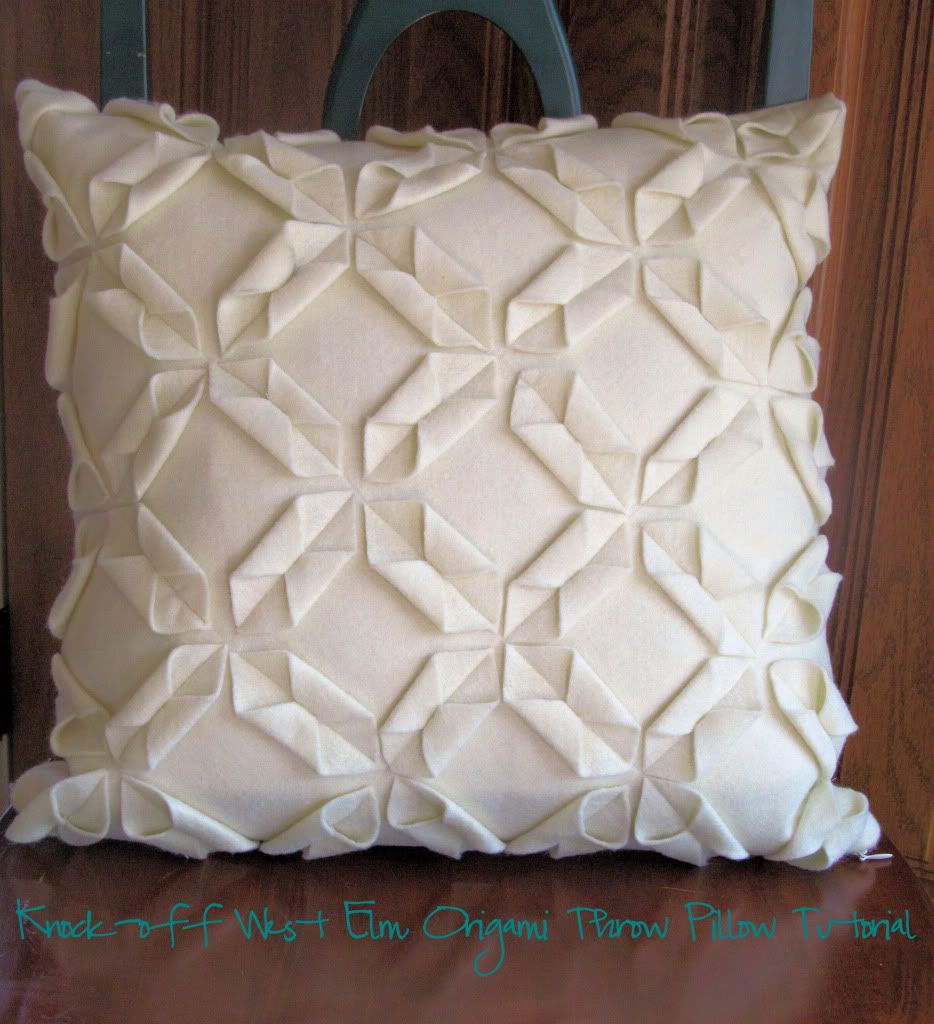
A few weeks ago my honey and I found ourselves with some time in our local (ha!) metropolitan area. We don't get out of town very often, so we decided to go look through some shops before we had to head back home. One of the stores we stopped in was West Elm, and I LOVED just about everything they had in the store. I especially fell in love with their origami pillows, (shown HERE) and decided to try and make my own when I got home. The original was $34. I made my version for less than $10 using some coupons and a pillow form I already had from some pillows I got at Ross.


So here's the original:


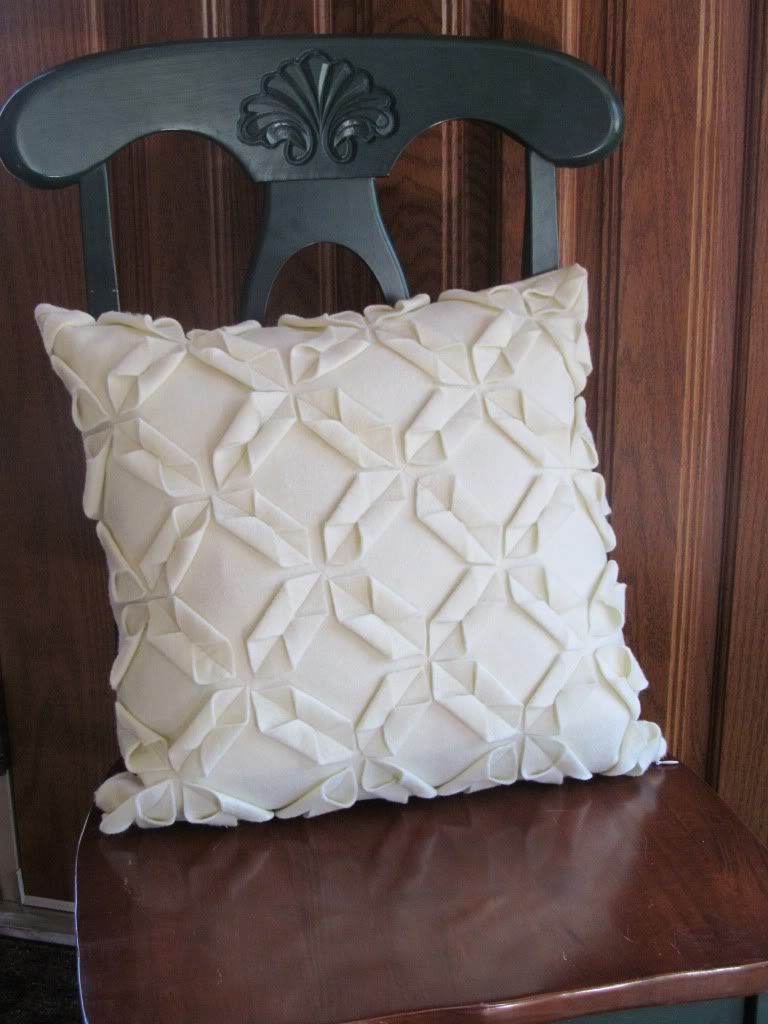
And here's my version!

Pretty close, huh? Pillows are one of my favorite things to make, and this one was no exception. The original was made with wool felt, but I couldn't find it locally, so I went with the best felt I could find. It still turned out great. Please don't confuse "premium felt" with crafting felt though. I don't think that would look quite as nice. Here's how to do it:

West Elm Origami Throw Pillow Knock Off Tutorial


Materials Needed:
*3/4 yd premium felt in choice of color (Mine was 72" wide. Adjust amount for shorter widths)
*Thread in closest color match possible
*Invisible zipper in matching color
*18" pillow form
*Basic sewing supplies (pins, scissors, sewing machine, etc)

Cutting dimensions:
* 2- 19" squares
*49- 2 1/2" squares (That's not a typo. You really need 49 squares exactly)

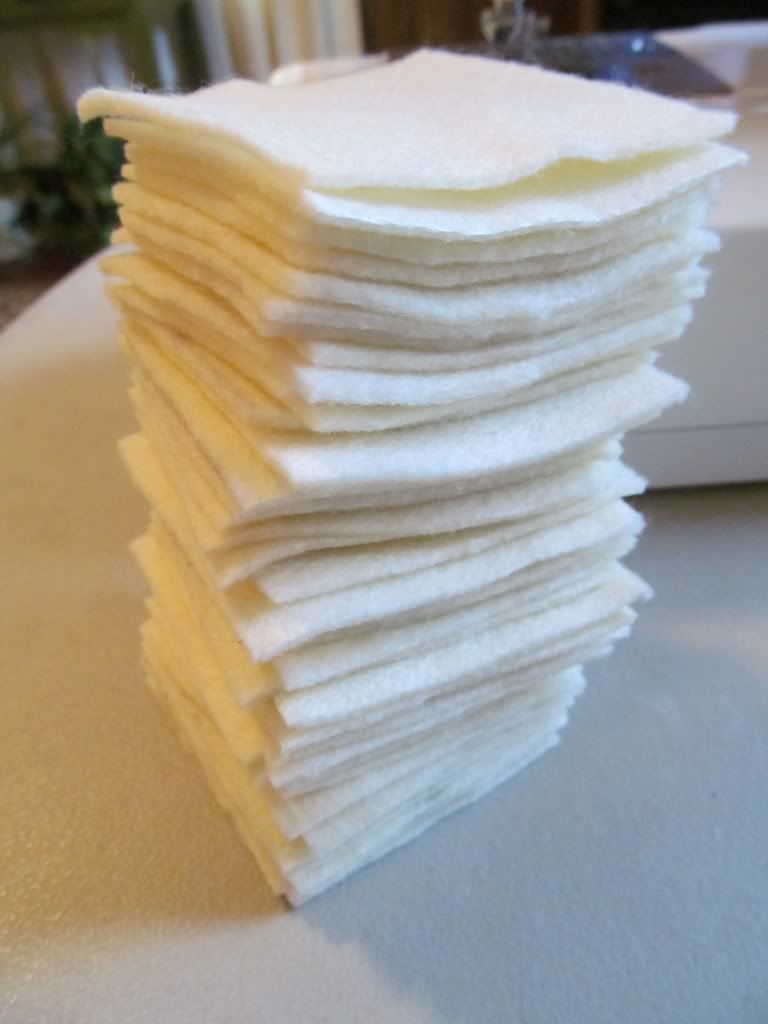
Step 1: Carefully cut out your fabric pieces keeping them as square as possible. Stack up the little squares and take them to your sewing machine. Get ready to sew.
(Here's all my squares stacked and ready to go!)

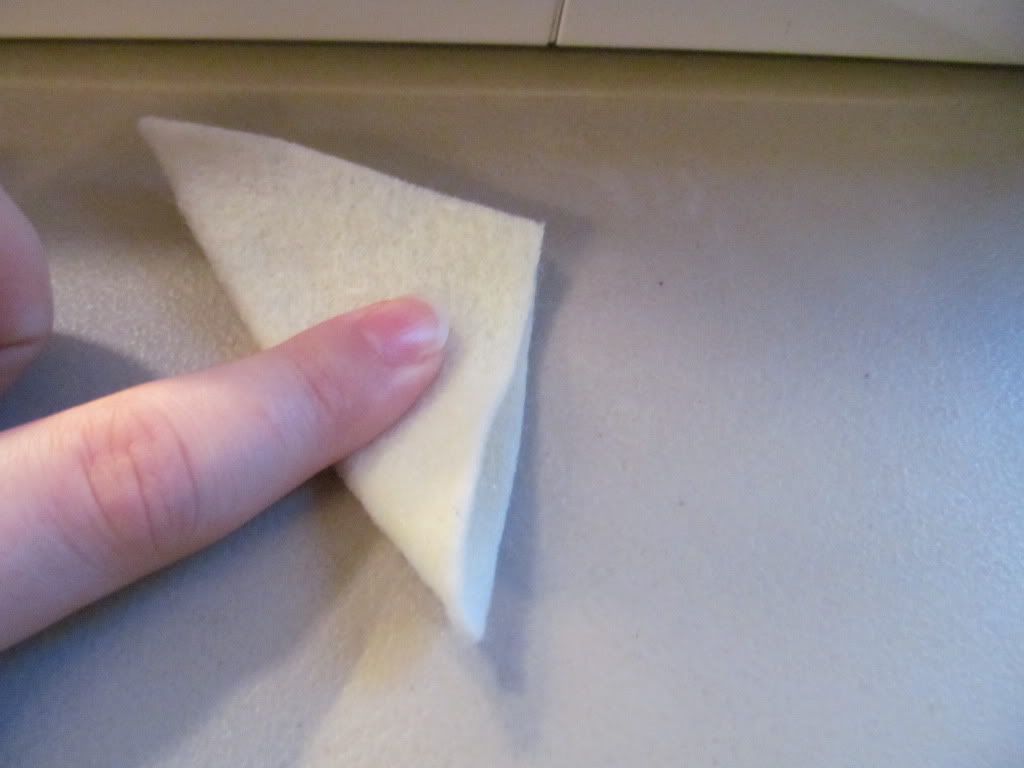
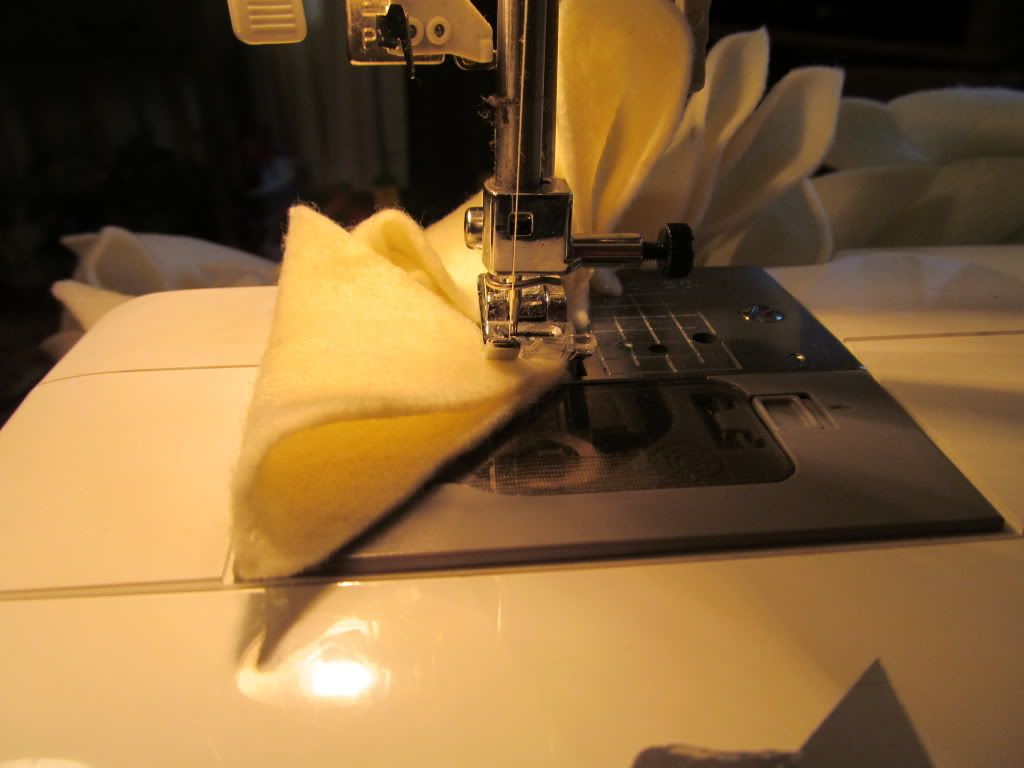
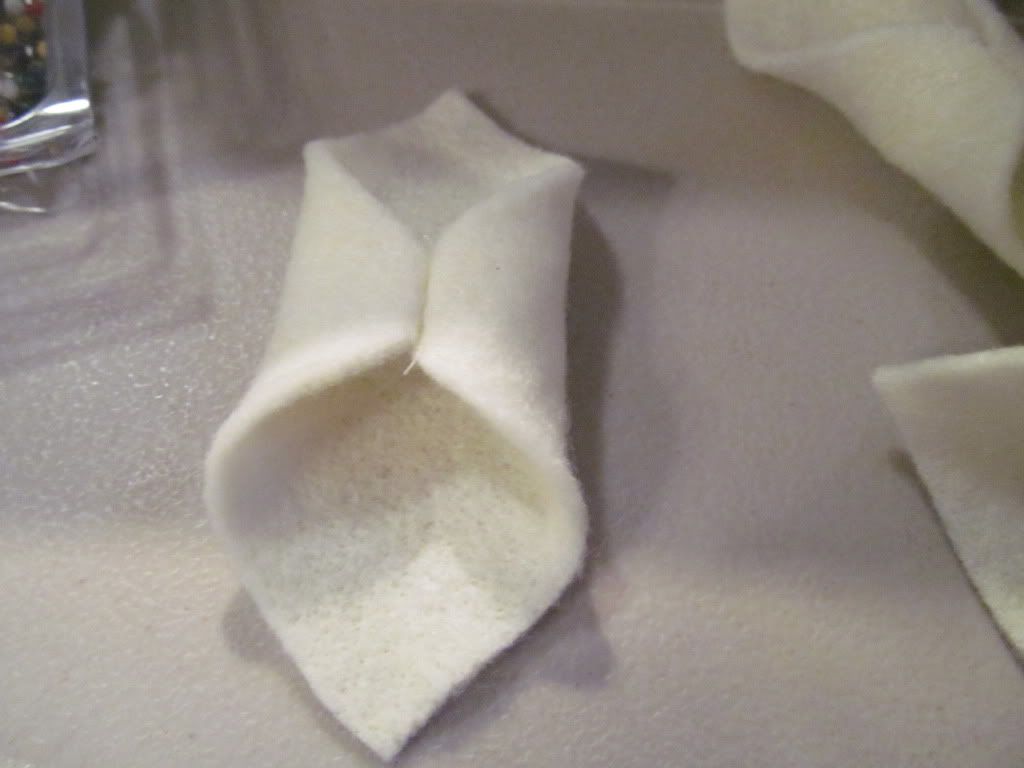
Step 2: Take one square and fold it in half to make a triangle with right sides together (see picture). Sew as close to the edge across the tip where the two corners meet (see 2nd picture). Do not clip the string. Continue folding squares in the same manner and "chain" them one after the other. This will save you a lot of time and thread by not cutting in between. 


(How to fold your squares)

(Stitch as close to the edge as you can. You can sort of see the rest of my "chain" forming in the background)

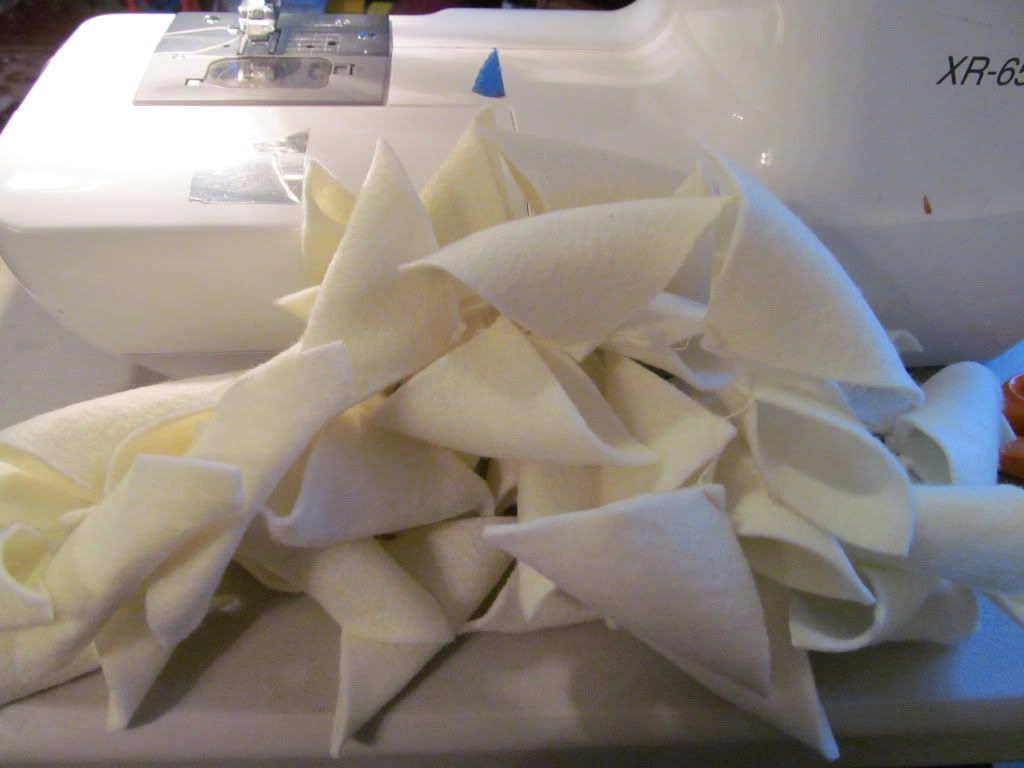
(This is what it should look like when you're done. A whole long strip of puffy triangles.)

Step 3: Clip the threads between each triangle, leaving as little thread showing as possible without clipping fabric or unraveling the stitching. 

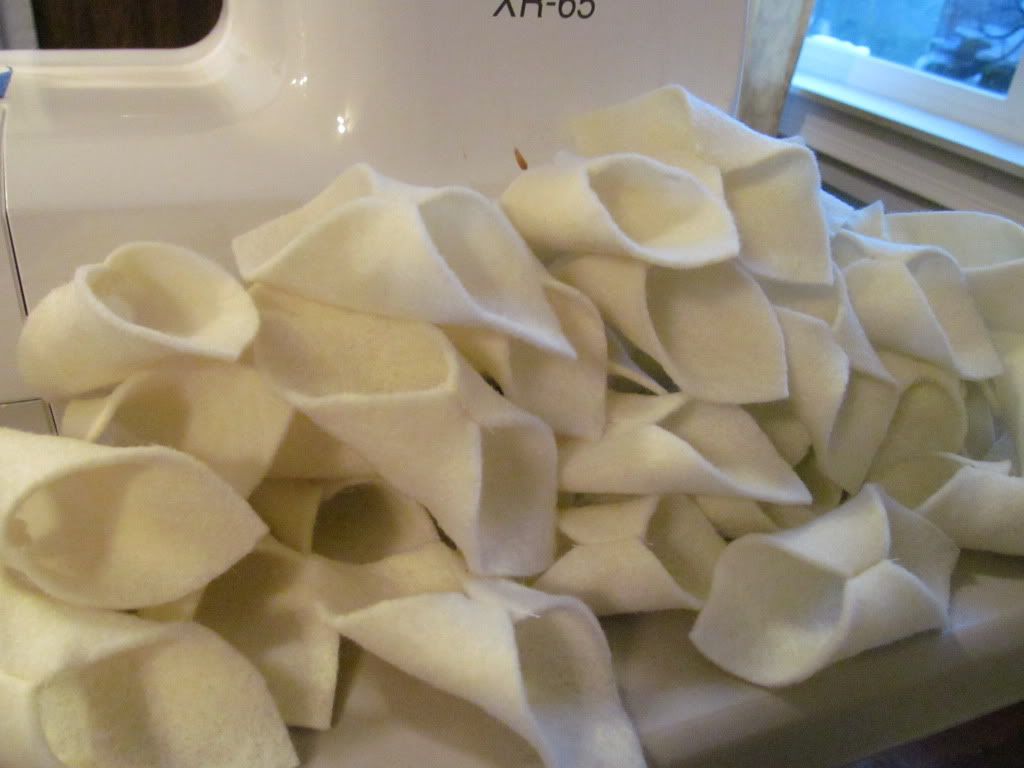
Step 4: Carefully turn your "triangles" right side out. Don't worry about trimming the excess fabric off the tips or pressing seams. This is what you should have when you're done:
(These kind of remind me of cannoli shells! In fact, I'm going to refer to these as cannolis for the rest of the tutorial)

(Just for fun, here's what the whole lot of them look like.)

Step 5: Lay one 19" square right side up on a table or work surface. Measure in a half inch from each edge of one of the corners. Mark with a pin.


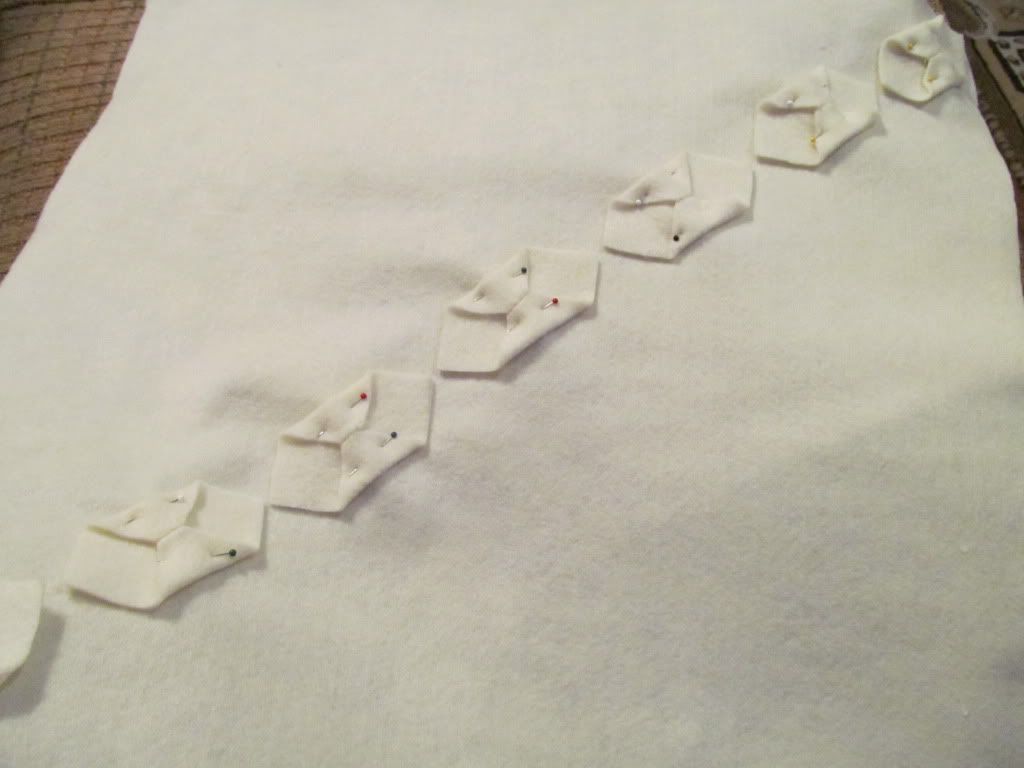
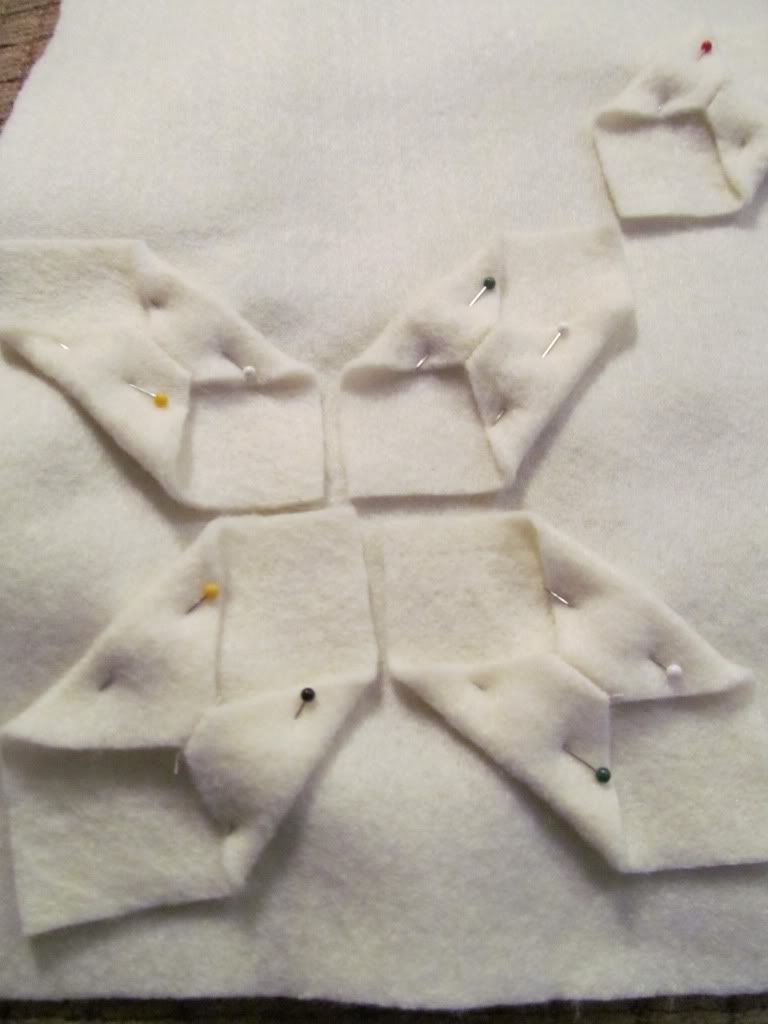
Step 6: Flatten a cannoli so the center seam is lined up with the end points. Line up one of these points with the pin on the large square and pin in place. (You want to create a diagonal line from corner to corner with cannolis, so keep that in mind while placing.) Continue placing cannolis end to end leaving a small gap between each until you reach the opposite corner.


(Here's what it should look like at this point.)


Step 7: Begin placing cannolis going the other direction at each gap, creating a four way intersection. (see picture) 


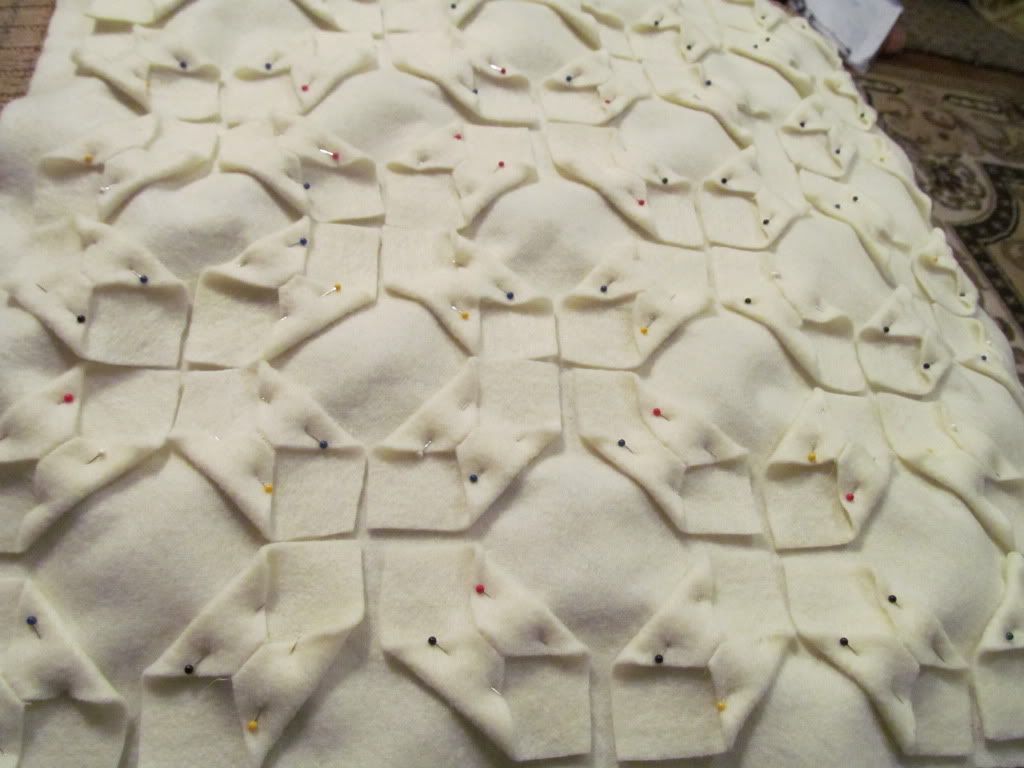
Step 8: Continue pinning your cannolis end to end on each new row, just as you did with the first row, until you reach the edge (there should be a gap for the 1/2" seam allowance).
(This is upside down if you look at all my other pictures, so don't let that confuse you. Just make sure you're creating new diagonal rows that cross at the gap of your original row.)

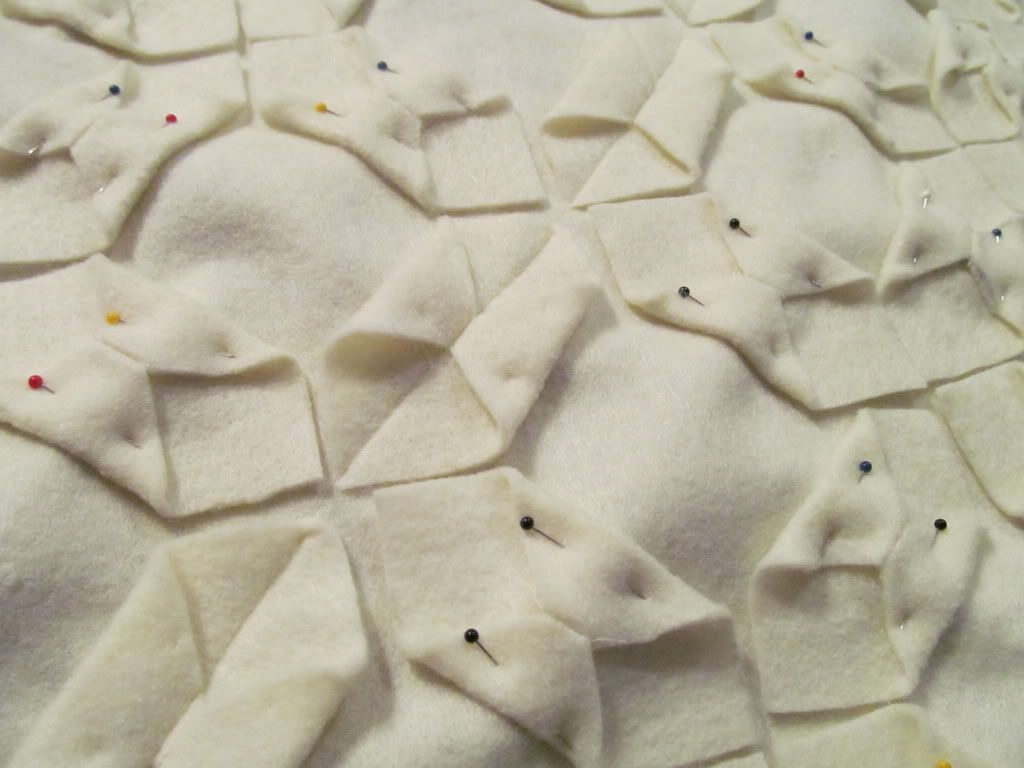
Step 9: Now that all you're rows are finished one way, begin pinning cannolis between the gaps of the rows you just created, horizontal to the first row.

(This is what you should end up with.)

Step 10: Beginning on any row (I started on the original center row), Stitch through the center of all your cannolis making sure to stitch across the point and center seams.

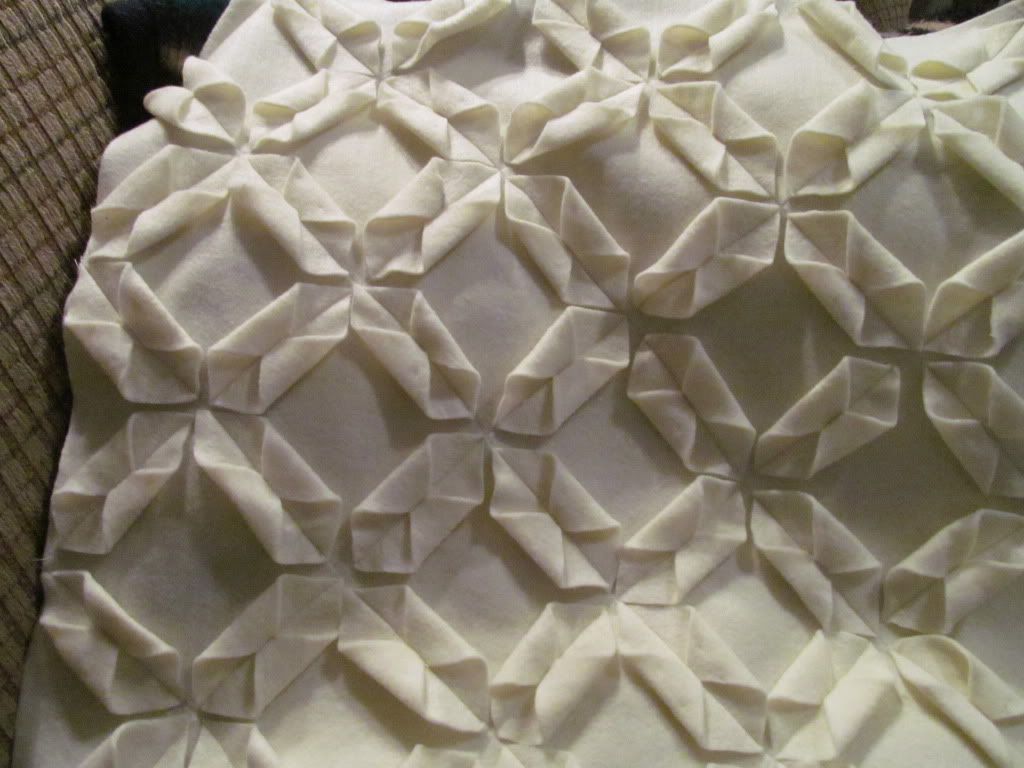
Step 11: Continue to stitch down the center of all the rows. The front of your pillow is now done and should look something like this:
(Pretty, isn't it?)
Step 12: Shorten your zipper to fit along one end of your pillow. Sew on your invisible zipper following the manufacturer's directions or your favorite tutorial, except adjust the seam allowance to 1/2". (This was my first invisible zipper and was really intimidating but ended up not being too hard!) Trim some of the excess fabric for a cleaner look.


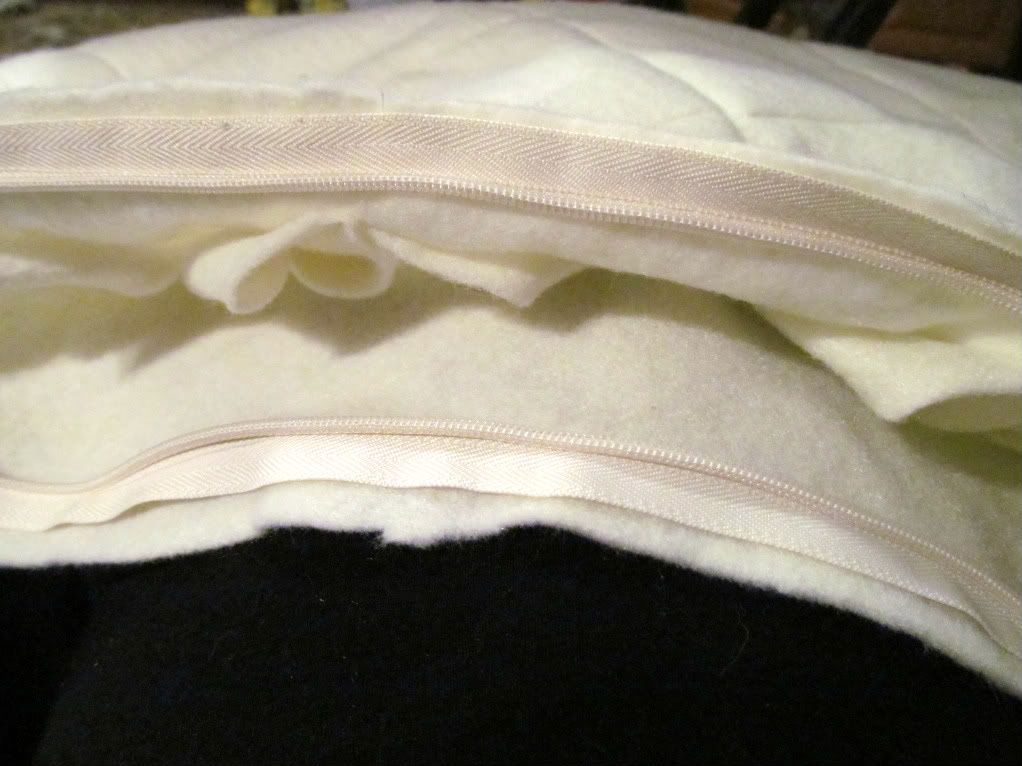
(Here's my zipper after it was sewn in and before I'd trimmed my edges.)

Step 13: Continue sewing around the edges of the pillow (right sides together) with a 1/2" seam allowance. Clip your corners, turn, push out the corners, and then stuff that puppy! You're all done! :)


Be sure to let me know if you make this and link up a picture of the project so I can see how yours turned out too! I'm really curious how this would look in other colors. :)

Linking to:

Skip to my Lou ♡ Polly Want a Crafter ♡ Lines Across My Face ♡ Sarahndipities ♡ Sumo's Sweet Stuff ♡ Sew Can Do ♡ Vintage Wanna Bee ♡ Mommy By Day, Crafter By Night ♡ Today's Creative Blog ♡ Not Just a Housewife ♡ Coastal Charm ♡ Chef In Training ♡ Oopsey Daisy ♡ It's Overflowing ♡ My Girlish Whims ♡  Blue Cricket Design ♡ Someday Crafts ♡ Lil' Luna ♡ Southern Lovely ♡ 733 ♡ Sew Much Ado ♡ The Sasse Life ♡ The Trendy Treehouse ♡ Junk in Their Trunk ♡ Polka Dots on Parade ♡ Bear Rabbit Bear ♡ The Shabby Nest ♡ Fingerprints on The Fridge ♡ Family Ever After ♡ Tatertots and Jello ♡ Destination: Craft ♡ Vintage Mauve  ♡ The DIY Dreamer ♡ Every Creative Endeavor ♡ Threading My Way ♡ See Vanessa Craft ♡ Naptime Crafters

(I did something goofy and accidentally deleted my entire linky list for this project. {Just about had a heart attack!} I've repopulated it as best I can, but if you're missing from the list, please let me know so I can add you back. Thanks!)


Photobucket